
Upgrading Heads
The first time you install Heads, you’ll need a hardware flash programmer to be able to replace the existing vendor firmware. Subsequent upgrades can be performed via software, although you’ll probably want a hardware programmer since we don’t have a fail-safe recovery mechanism in the event of a bad flash or buggy firmware.
Additionally, reflashing the firmware will change the TPM PCRs. This will require generating a new TPM TOTP token and a new drive encryption key. Be sure you have your TPM owner’s password and your disk encryption recovery key or passphrase available since, by design, the disk key is not accessible to the recovery shell.
Recovery shell
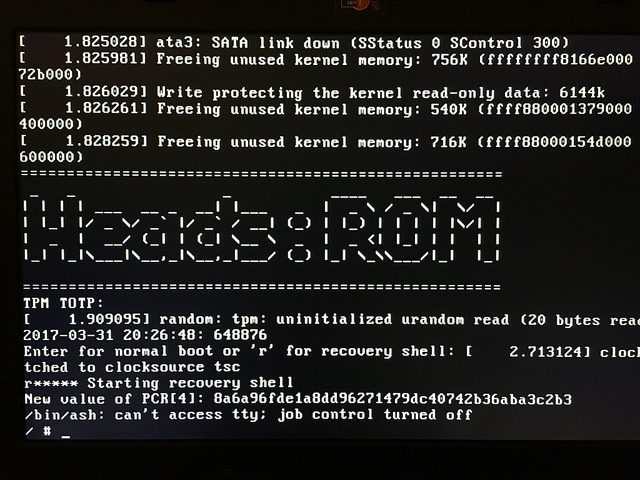
If the flash protection bits are set correctly it is not possible to rewrite the firmware from the normal OS. You’ll need to reboot to the Heads recovery shell (hit r after the TPM TOTP prompt).
Internal Flashing
Reconnect power to the laptop and you should be able to boot into the Heads recovery shell.
Plug your USB flash drive into the laptop that you used to build Heads. If your USB drive is already formatted as ext4 or you are confident you can format it then just move the coreboot.rom file to the usb drive. Otherwise, find your usb drive using fdisk:
sudo fdisk -l
Format your usb drive as ext4 (My usb drive is /dev/sdb):
sudo mkfs.ext4 /dev/sdb1
These are the commands I used to create a directory ~/usb/ and mount my usb drive there, but you can mount it wherever you want:
mkdir ~/usb
sudo mount /dev/sdb1 ~/usb/
Move the full Heads rom file to the usb drive:
sudo cp ~/heads/build/x230/coreboot.rom ~/usb/
Insert the usb drive into the Thinkpad x230 and mount it:
mount-usb
You should now see the file coreboot.rom in /media:
ls /media/
Internally flash coreboot.rom (This command will write to both SPI flash chips as if they are one 12Mb chip):
flash.sh -c /media/coreboot.rom
Wait for the flashing to finish and you should be able to reboot into Heads!
Mounting the USB media
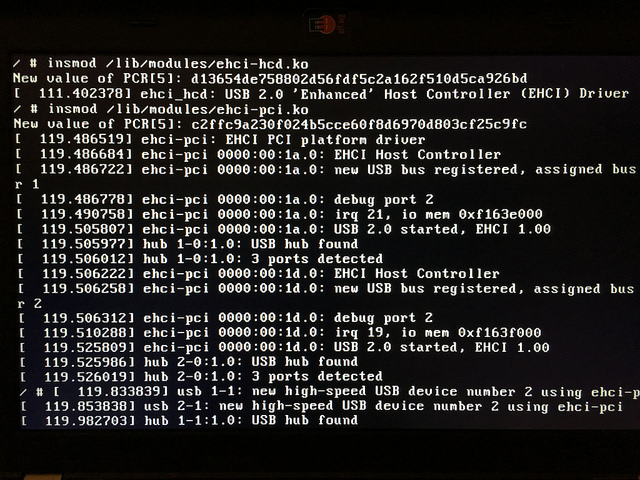
The Heads boot process does not have USB or network drivers by default and neither does the recovery shell (although this might change). You need to load the Linux kernel modules, which will change the default module PCR 5:
insmod /lib/modules/ehci-hcd.ko
insmod /lib/modules/ehci-pci.ko
When you insert the drive you’ll see a console message about the partitions on the new device. Typically it will be the first partition, /dev/sdb1, or sometimes just /dev/sdb if there is no partition table. Make a directory and mount the device read only:
mkdir /media
mount -o ro /dev/sdb1 /media
Flashing the ROM
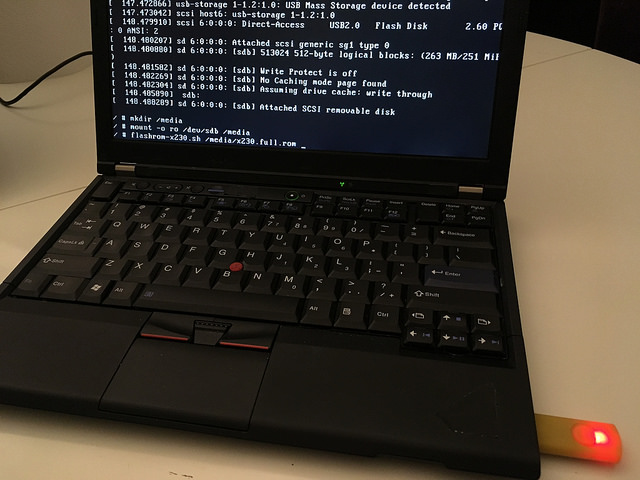
There is a helper script /bin/flashrom-x230.sh that uses the x230 flash ROM layout and the Heads modified version of flashrom to write to the chip. One of the modifications is to avoid touching or reading the ME section, so it is not necessary to have used the ME cleaner or unlocked the flash descriptor.
flashrom-x230.sh /media/x230.full.rom
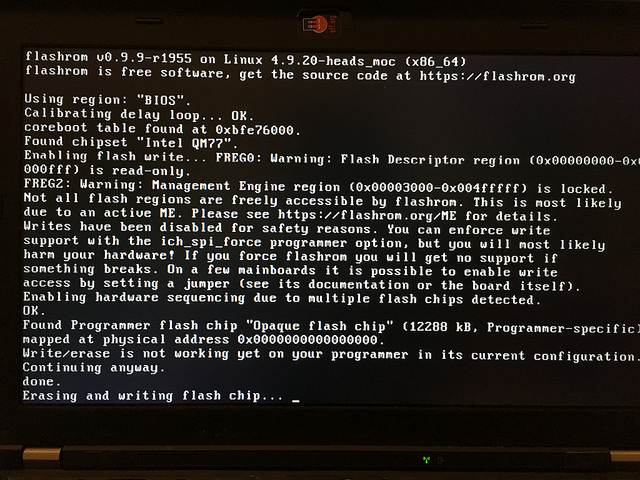
If all goes well it will write for about a minute and then report success. Due to hacks in flashrom, it does not read back what it wrote to verify, so hopefully it worked.
Reboot and verify that the new firmware is running. You’ll be dropped into the recovery shell immediately since the TPM TOTP secret will not be unlocked. Since the first boot after flashing will also adjust the MRC cache, it is necessary to do a second reboot to ensure that the TPM values are at their persistent state (issue #150 aims to fix this).
Regenerating the TOTP token
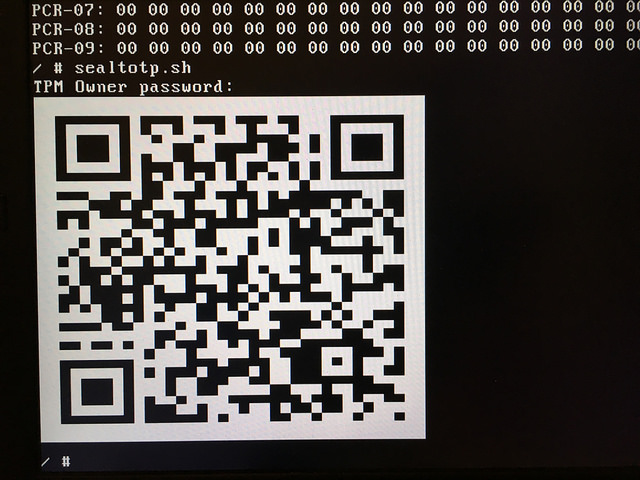
After the second post-flash reboot, generate a new token and store the QR code in your phone by running:
sealtotp.sh
This needs the TPM owner password to be able to define the NVRAM space. (todo: issue #151).
Resealing the disk encryption keys
When you get to the standard boot menu and after you verify the TOTP, select ‘m’ to go to the full boot menu. Select the option you want (usually the first), make it the default by hitting ‘d’ and also say ‘y’ when asked to reseal the disk keys.